

- ไปที่เวบ Hostgator
- เข้าไปแล้วคลิกปุ่ม get started now

- เข้าไปแล้วจะเจอโฮส 3 plan
– Hatching รองรับ 1 โดเมน ไม่จำกัดเนื้อที่และ bandwidth
– Baby เหมือน hatching แต่รองรับหลายโดเมน **แนะนำแผนนี้ครับ
– Business plan เหมือน baby แต่แถม ssl certificate ด้วย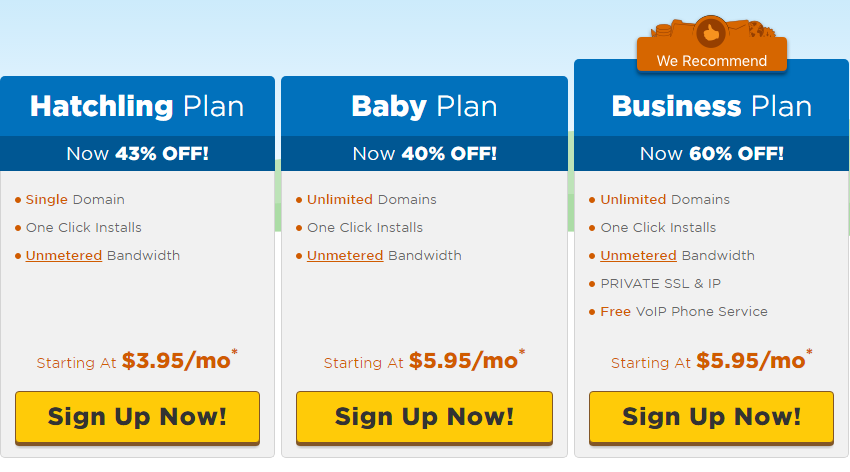
- หลังจากเลือก plan แล้วจะมาหน้าถามเรื่องโดเมน ตรงนี้ถ้าเราจดโดเมนมาแล้วจากที่อื่น (ดู วิธีจดโดเมนกับ name.com) ให้เลือก I already own domain ถ้าไม่มีก็เลือกจดกับ hostgator ได้ แต่ค่าโดเมนจะแพงกว่าที่ name.com

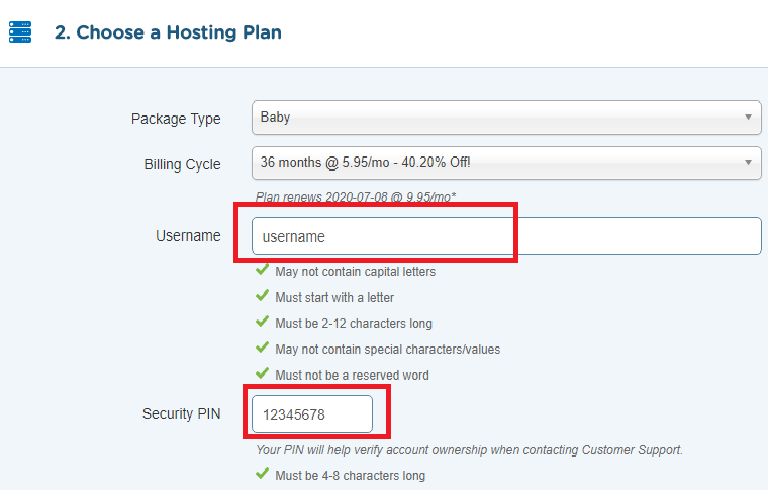
- เลื่อนลงมาตรง choose a hosting plan ตรง billing cycle ให้เลือก 12month เป็นต้นไป เพราะจะคุ้มกว่าเลือกเป็นรายเดือน ถ้าเราไม่พอใจ เราสามารถขอ refund ใน 45 วันได้

- ตั้ง username กับ security pin ให้ตั้งอะไรก็ได้ แล้วจดไว้
- เลื่อนลงมาตรง enter your billing info ใส่ข้อมูลลงไปเป็นภาษาอังกฤษ เลือกวิธีจ่ายเงินที่ payment type เราสามารถจ่ายด้วยบัตรเครดิตและ paypal

- เลื่อนลงมาที่ 4. Add Additional Services ติ๊กออก Protect Your Site From Hackers กับ back up ออก

- coupon code ใส่ snappy สังเกตว่าต้องไม่มีค่า addon ใดๆ

- เลื่อนลงมาข้างล่าง ติ๊ก agree แล้วก็ checkout แล้วก็จ่ายเงิน

- จากนั้น hostgator จะส่งรายละเอียด login cpanel มาให้ทาง email
[button size=”large” url=”https://www.hostnog.com/hostgatorsite” ]ไปที่เวบ ฺHostgator.com[/button]